
Lately I’ve been reading a lot about angular2 and how it’s going to change drastically from what we know about the original Angular. Since it is in Developer Preview at the moment, I decided to give it a try and talk about my experience with the 5 MIN QUICKSTART on windows pc as this is the OS I work with on a daily basis.
As you can see in the Angular webpage, this guide was developed with TypeScript, so you must have installed Node and npm to download the packages and compile the Typescript code and also for testing the app, they use a module for setting up a simple local server. If you don’t have it installed yet, here is a guide.
I’ll go through all the steps as shown in the guide and talk about the changes I had to make for it to work properly.
Creating the project and setting up the environment
First of all, I created the folder where I wanted to have all the files for the project and navigated to it on the PowerShell console, in this case I named it “angular2quickstart”.
1 | mkdir angular2quickstart |
Then I installed the Typescript package manager. This will be useful to download all the Typescript dependencies to run the application. You might get some warnings but for now just ignore them.
1 | npm install -g tsd@^0.6.0 |
After installing the typescript tsd, I got the typescript angular2 definition and all its dependencies
1 | tsd install angular2 es6-promise rx rx-lite |
I then created the typescript and the html file. You can create them manually with the explorer, or if you want, you can do it by command line as well.
1 | $null >> app.ts |
Notice that I didn’t create an app.js file but an app.ts, this is because a .ts file is a Typescript file.
Running the TypeScript compiler
After creating the project, it was time to set up the compiler and make sure that everything worked fine.
First, I tried to install typescript with the command in the guide.
1 | npm install -g typescript@^1.5.0 |
And here is where I started having difficulties. I got this error “npm ERR! version not found: typescript@1.5.0”
I added a condition to the command so it would take any version between 1.5.0 and 1.6.0. The command is the following.
1 | npm install -g typescript@">=1.5.0 <=1.6.0" |
It worked fine. I managed to install Typescript, then it was time to test the typescript compiler
1 | tsc --watch -m commonjs -t es5 --emitDecoratorMetadata app.ts |
Another Error! This time it was complaining about two unknown options, watch and emitDecoratorMetadata.
1 | error TS5023: Unknown option 'watch' |
After some research, I found out that I already had Typescript installed on my PC because it comes with the installation of Visual Studio 2013, which I had installed. The problem was that the version that comes with Visual Studio is version 1.0 and is also set on the PATH environment variable.
That meant that no matter how many times I installed another version with npm, every time I executed the “tsc” command I would point to the version set on the PATH (which is version 1.0), so I had two options here:
- Change the value of the typescript PATH variable and set it to: “%appdata%Roamingnpmnode_modulestypescript”
- Install the latest TypeScript version compatible with Visual Studio 2013 and don’t mess with the PATH variables.
I went for the second option because I wanted to be able to do some things in the future with Typescript on Visual Studio and I didn’t want to mess with the PATH environment variable.
After installing the typescript version for visual studio I executed the command again and it didn’t work, this time I got another error “error TS5001: The current host does not support the ‘–watch’ option.” That meant that I was going to have to compile manually the file every time I modified the app.ts file.
I removed the “—watch” option from the command and gave it a try, and…… Another error!!! ”error TS6064: Option ‘experimentalDecorators’ must also be specified when option ‘emitDecoratorMetadata’ is specified.” This error was very easy to solve as I just had to add the “experimentalDecorators”, so I did and Finally!! it worked! (except for the fact that I had to compile the file manually).
The final command is the following.
1 | tsc -m commonjs -t es5 --emitDecoratorMetadata --experimentalDecorators app.ts |
After this, I must admit that the rest was very straightforward.
Importing Angular
Now the fun part: The code!!
I added the following lines to the app.ts file.
1 | /// <reference path="typings/angular2/angular2.d.ts" /> |
The first line of the example imports the type definition from angular and the second line is a statement that imports three symbols from Angular(Component, View and bootstrap).
Defining the component
Time to define the component of the application.
1 | // Annotation section |
Here we have two parts:
- The components annotation (@Component, @View) which can can be identified by its at-sign (
@). It takes care of the components into the page. - The component controller which is the “MyAppComponent” class. It takes care of all the logic of the template.
This will look for the ‘my-app’ tag item in the page and put the template <h1>Hello </h1> on it. As the Template has access to any property or function on the component controller, it binds the name property from the component controller to the double-mustache syntax property on the template ({{name}}).
Bootstrapping
At the end of the app.ts file, I called the bootstrap function in order to render the component into the page.
1 | bootstrap(MyAppComponent); |
Declaring the HTML
Now is time for the HTML.
At first I created the structure to include the traceur-runtime(Support for EC6), System(loads ES6 modules) and the Angular angular module.
Lastly, I loaded the module of my app
1 | System.import('app'); |
Running the application
I installed the node package for running the local server
1 | npm install -g http-server |
After that I was ready to run the application.
1 | http-server |
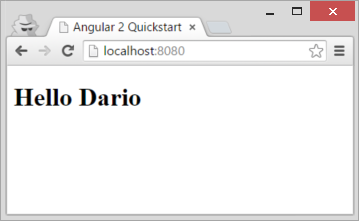
That’s it! Browse to the server Url and you should be able to see your first Angular2 application!!!
Here is the code. I’ve added a PowerShell script if you want to download it and make it work.
If you want to make some changes and play around with it after you’ve already run the script, remember to compile the app.ts file manually so the app.js file gets updated.